With LusoCAD, you can turn any drawing object into an intelligent link (Hyperlink) that opens specifications, 3D models, procedures or contacts exactly when you need them. Using Insert > Hyperlink (or Insert > Data panel), you can attach URLs to manufacturer pages, point to local or server files such as Word, Excel or PDF, link to layouts or views saved in the same drawing, or even create mailto links for supplier support in maintenance flows.As well as referencing information, hyperlinks also enhance navigation: by saving views with a name and creating hyperlinks at the edges of viewports, you can switch effortlessly between Presentation Space and the exact Model Space view associated with a sheet.
This article shows how to add hyperlinks effectively and presents a proven, step-by-step workflow for navigating between layouts and Model Space with saved views, keeping your documentation connected and your team moving forward faster.
Adding and using hyperlinks
Adding a link is very easy. Activate the link from the menu: Insert > Hyperlink, or from the ribbon: Insert > Data Pane.

LusoCAD will ask you to select an object; you will then see this dialogue box:

In this example, you can add a link to a specification document on your local computer, point it to a file on your server or to a page on a website. In addition to local sites and files, you can also link to a layout or a view saved in your template. You can also link to an email address. You might want to link a particular item to a supplier's maintenance contact, for example. This can be useful for building maintenance purposes.
Navigate between Model Space and Presentation Space with hyperlinks
Below is a step-by-step process that helps you quickly navigate between Model Space frames and various Presentation tabs using Saved Views and Hyperlinks (this tip is extensive, but well worth the effort).
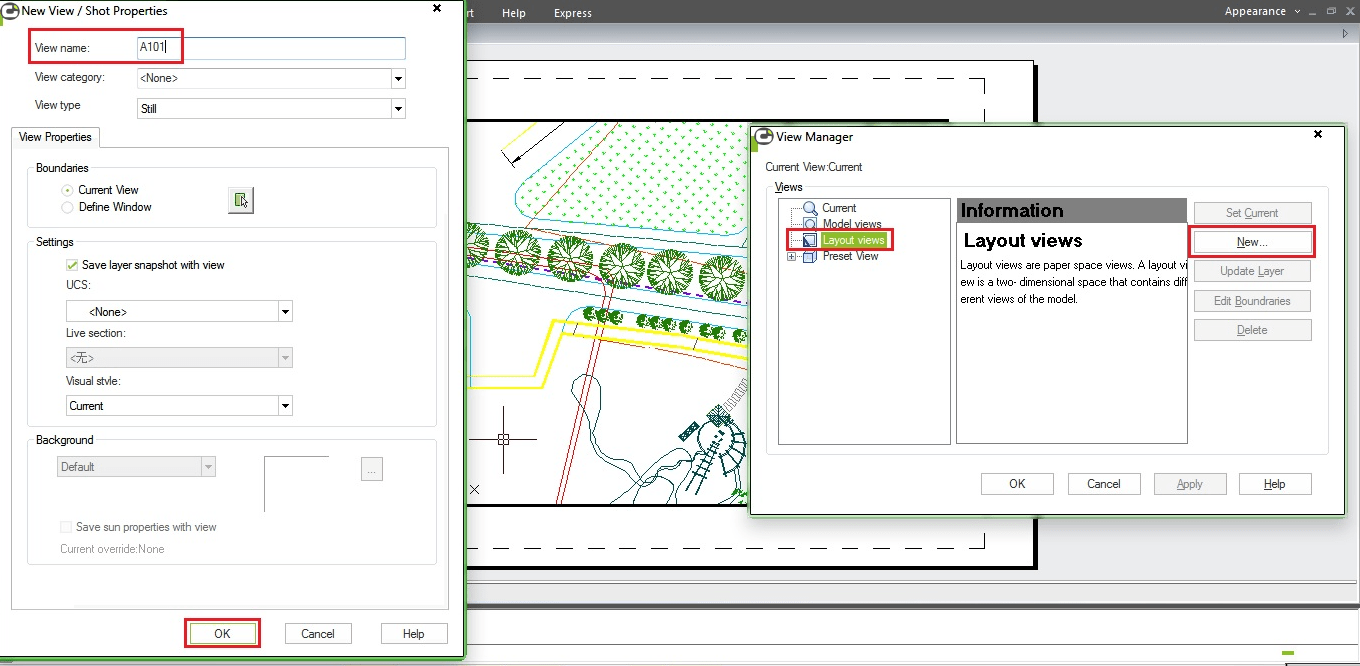
When you're in a Presentation tab, use the VIEW command to save a view name (I usually assign the name based on the sheet number, such as “A101”).
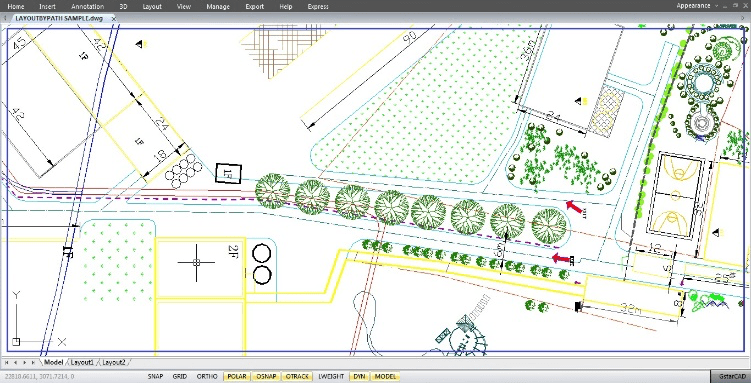
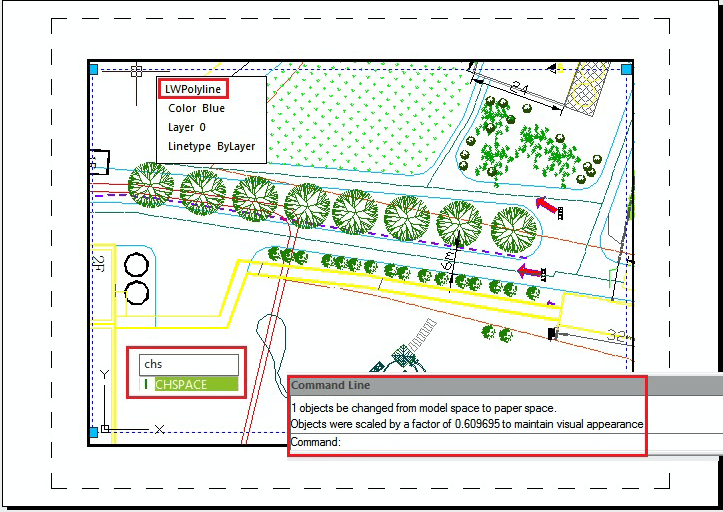
- Then draw a closed polyline around the perimeter of a Viewport (on the “defpoints” layer or on a separate layer set to “Don't print”) and use the CHSPACE command to send the polyline to Model Space via that Viewport.
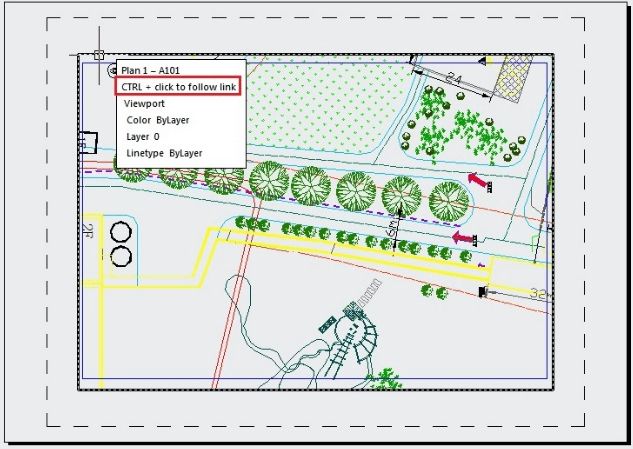
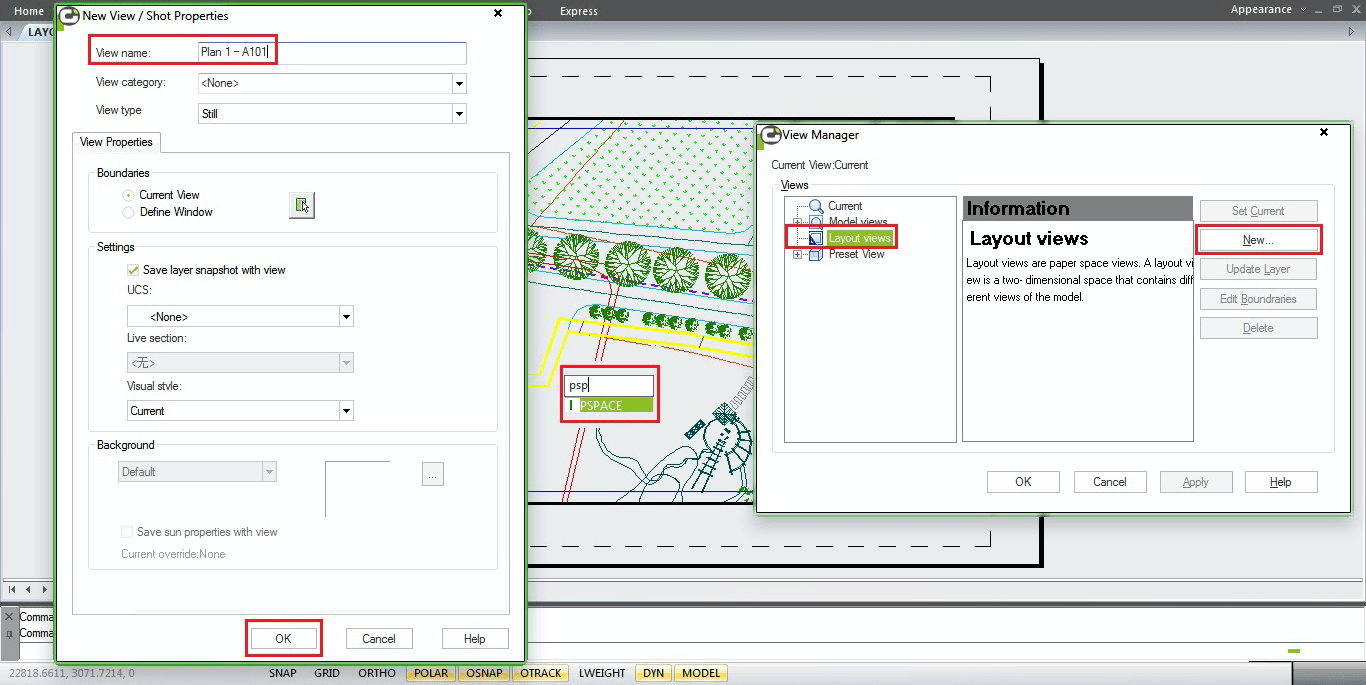
- With the cursor still in Model Space within the viewport, save a new view with a name that reflects what is being shown in the viewport and that includes the sheet number (e.g. “Plan 1 - A101”); then bring the cursor back to the Presentation environment (i.e. PSPACE command).
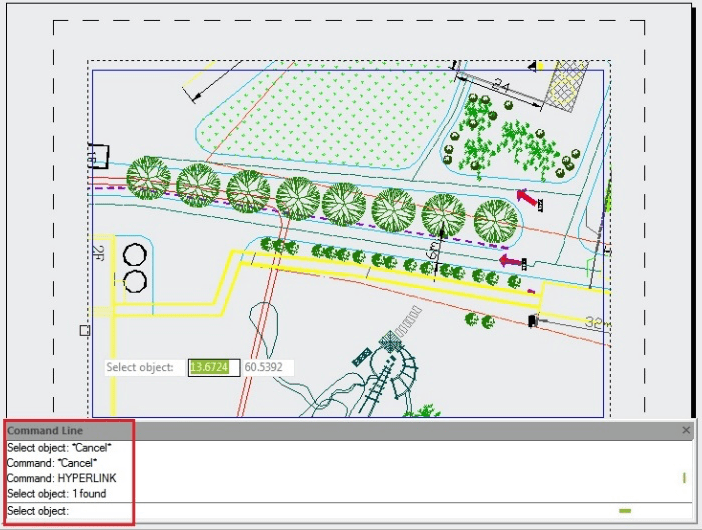
- Enter the HYPERLINK command.
- When prompted to “Select objects”, select the boundary of the viewport in which you have just saved a view.
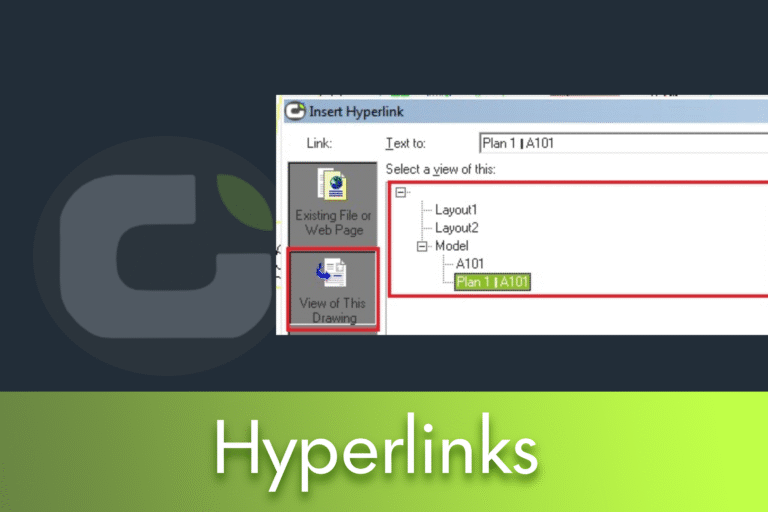
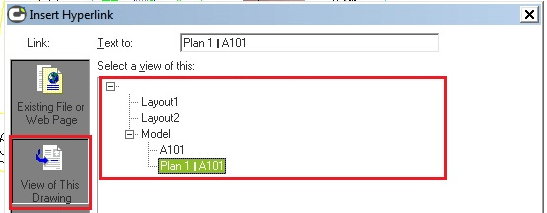
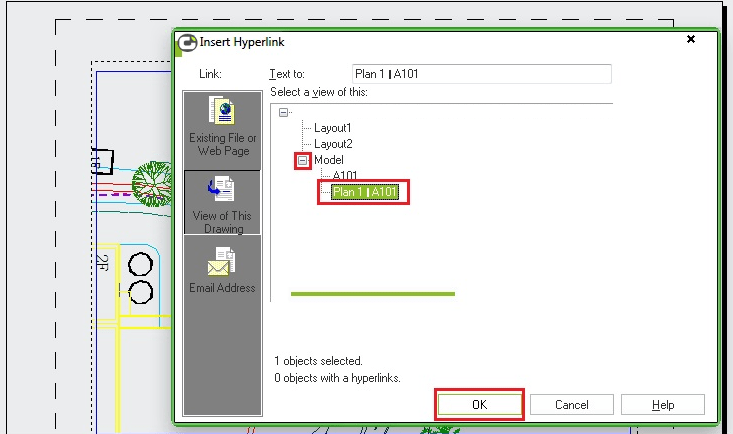
- When the “Insert Hyperlink” dialogue box appears, click on the “View this Drawing” button.

- Expand the Model tree by clicking on the “+” symbol, select the name of the view you have just created and click OK.
Now hold down the Ctrl key and click once on the edge of the viewport with the left mouse button. LusoCAD will switch to Model Space and zoom in to the area of the saved view you created earlier, and you'll also see the closed polyline you sent through the viewport.