In this practical guidewe explain how the tool Array LusoCAD distributes objects in rectangular, circular and path patterns. There are three main types: rectangular, polar and path. In this article, we show you each one with practical examples, the most important definitions and tricks to avoid rework.
Array is a command that duplicates a base object and distributes it according to geometric rules:
- Rectangular: in a grid of columns and rows.
- Polar: around a central point.
- Path: along a path with straight and curved segments.
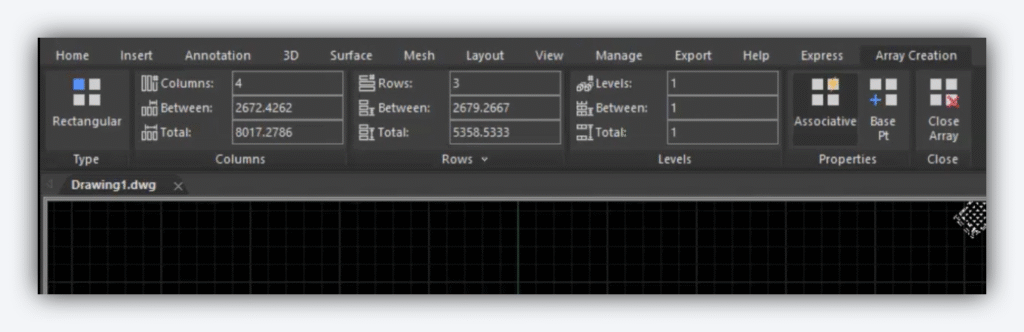
Main sections of the ribbon when editing an Array:
- Type: Rectangular, Polar, Path.
- Columns, Rows, Levels: defines quantities and spacing.
- Properties: specific options (rotation, direction, fill angle, split/measure, align, Z direction).
- Associative: controls whether the matrix is grouped for later editing.
- Base Point: to adjust the base point of the matrix. Or set the coordinates from the base point via the Properties pane. - Close Matrix: confirms the changes.
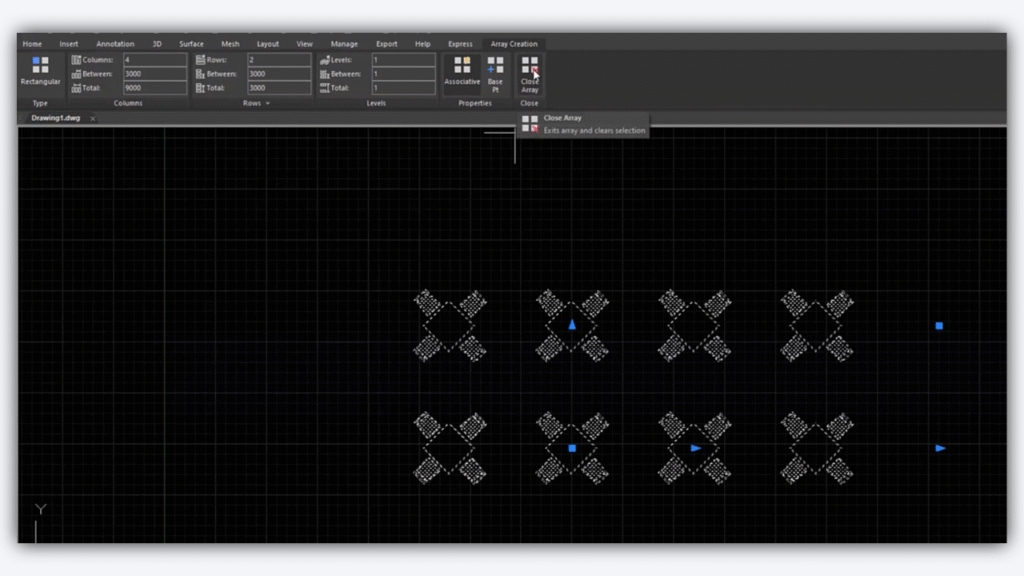
Rectangular matrix
Objective: create 8 tables in 2 rows (2 rows), with 4 columns, evenly spaced.
Steps:
- Select the tool: Modify > Array > Rectangular.
- Choose the base object: click on the table to replicate.
- Define columns:
- Columns: 4 (we want 8 tables in total in 2 rows → 4 columns x 2 rows).
- Distance between columns: 3000 (example value).
- Define lines:
- Lines: 2.
- Distance between rows: 3000 (as in the columns example).
- Levels (3D): ignore if you're only working in the XY plane.
- Associative:
- Activate if you want to edit the matrix as a single object later.
- Note: if it is not associative, you will not be able to reopen and change the parameters of the matrix.
- Close Array to confirm.
Edit or remove specific tables:
- To delete or modify individual tables, use Explode in the Array.
- After exploding, the elements are no longer connected and can be edited/deleted one by one.
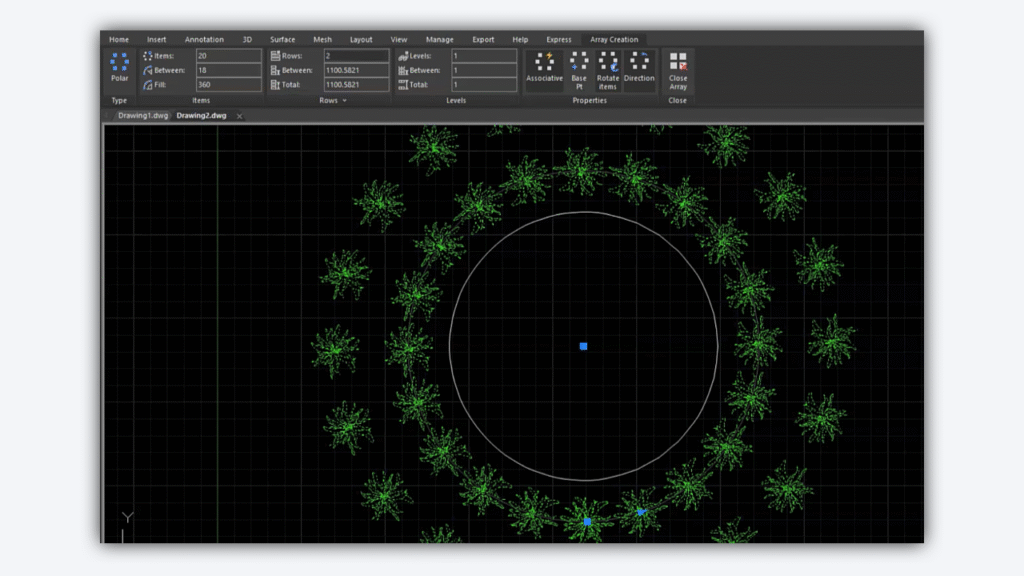
Polar Array
Objective: distribute plants around a circular shape.
Steps (full circle):
- Modify > Array > Polar.
- Select the object to replicate (plant).
- Define the centre point: click on the centre of the circle.
- Adjust quantity and distribution:
- Columns/rows as desired (normally the total number of instances is controlled).
- Specific properties:
- Rotate items: switched on so that each plant "looks" towards the centre; switched off to maintain the same rotation in all of them.
- Direction: clockwise or anti-clockwise.
- Close Array to confirm
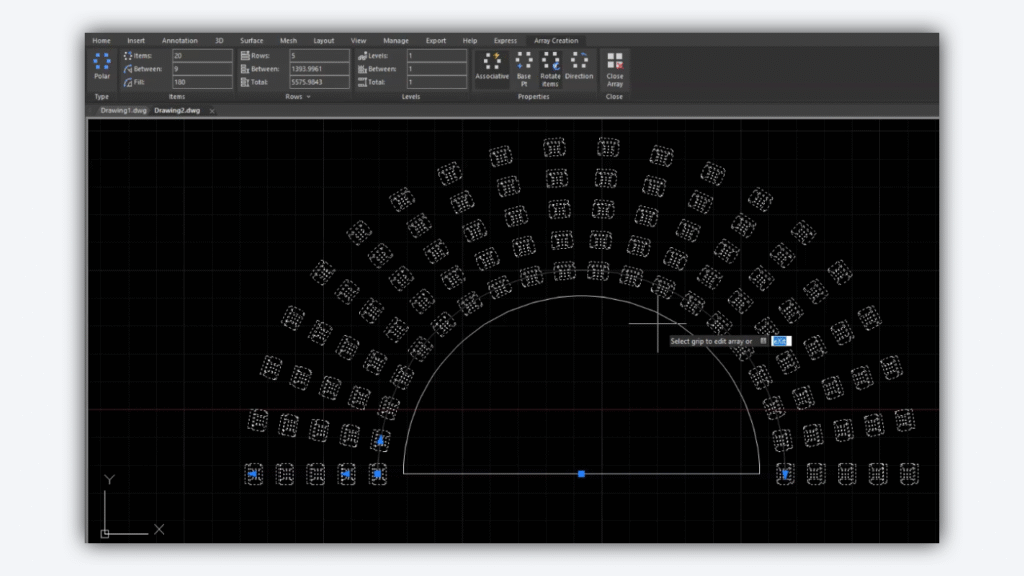
Semicircle (example with seats in an amphitheatre):
Objective: to distribute over 180°, not 360°.
Steps:
- Create Polar Matrix as above.
- In Fill, set 180°.
- Adjust the orientation/rotation until the desired alignment is achieved.
- Define the number of instances (columns/rows depending on the interface).
- Explode if you need to remove parts of the matrix and finalise the drawing.
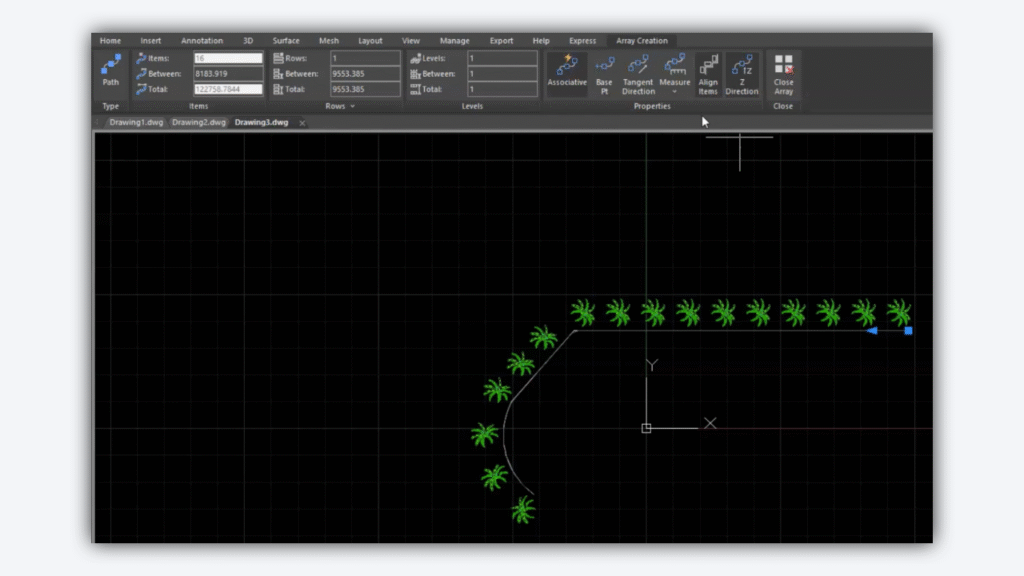
Matrix by Path
Objective: distribute objects along a path (line, polyline, curve), respecting straight and curved segments.
Steps:
- Modify > Array > Path.
- Select the object to replicate.
- Select the path (polyline/curve) to follow.
- Define the type of distribution in Properties > Measure.
- Divide: distributes the objects equidistantly along the total length of the path. The spacing is calculated automatically, so the "Between" field is blocked.
- Measure: maintains the number of objects and allows you to manually define the "Between" distance between instances.
- Align: active so that each object is tangent to the path (follows the curvatures).
- Direction Z: adjusts the position/elevation of the matrix relative to the path, useful in 3D scenarios.
- Close Array to confirm.
When to use Associative vs Explode
- Associative (on): ideal while you're experimenting with quantities and spacing. You can reopen the matrix and change parameters quickly.
- Explode: use when you need to edit/delete elements individually and no longer need parametric adjustments to the matrix.