

Dimension Styles in LusoCAD
The quota styles control the appearance of dimensions in your drawing: lines, arrows, text and units. Customising them ensures legibility, graphic consistency and compliance with project standards. In this guide, you'll see how to open the style manager, create a new style and adjust the main tabs to get clear, uniform dimensions at any scale.
Create a new dimension style
To get started, open the Quote Style window from the Annotation Ribbon or type the command shortcut "D" on the command line, equivalent to "DIMSTYLE". This window shows the existing styles and allows you to create or modify styles according to the needs of the drawing. Working from here is faster and keeps all the dimensioning settings centralised and easy to reapply.
Create a new style by clicking "New..." and give it a descriptive name. Assigning clear names makes it easier to choose later and avoids confusion when you have several styles at the same time. After naming, enter the tabs to customise the appearance and behaviour of the quotes.

After customising the tabs, confirm the changes and set the new style as current. Look at the result in the drawing and compare it with the previous style to check that the size of the arrows, the height of the text and the numerical precision match what you want. If something isn't perfect, go back to the manager and make small adjustments until you achieve a balance between clarity and graphic economy.
In professional practice, it's common to maintain several styles of dimension to communicate different scales, disciplines or levels of detail. For example, you might have a "general plan" style with more contained arrows and text, and another for "details" with greater visual prominence. The important thing is to limit the number of "official" styles and document when to use each one, to preserve consistency across the team.
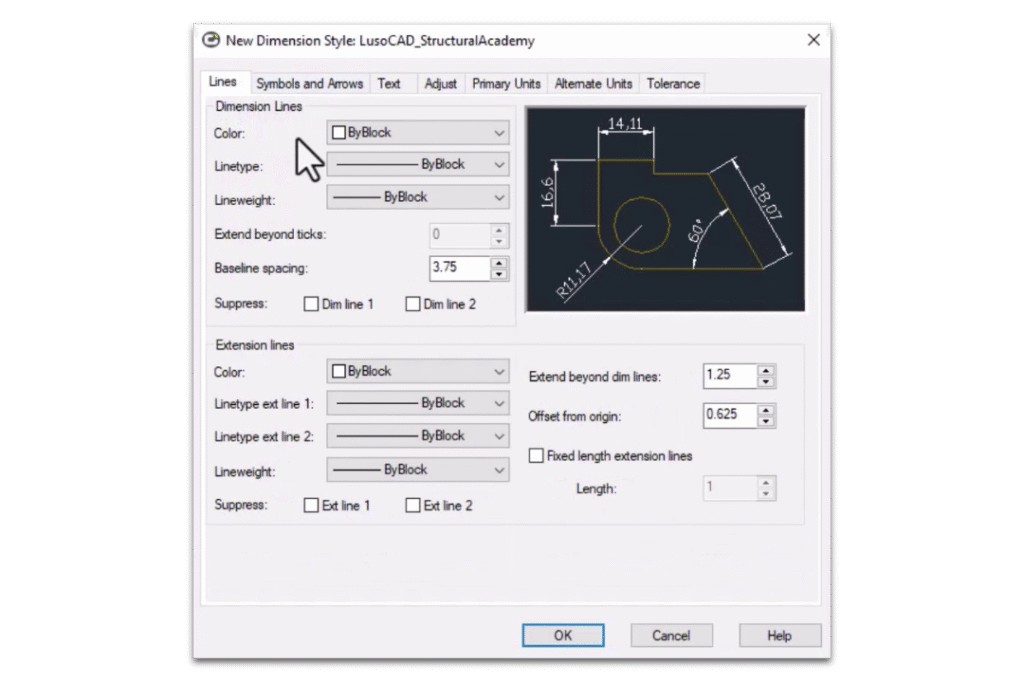
If you encounter problems, think about the symptoms and the most likely solutions. Disproportionate text or arrows can be solved by adjusting the height in the Text tab and the size in Symbols & Arrows. Incorrect precision can be corrected in Primary Units, ensuring the number of decimal places and suffixes are consistent. Too many or too few lines can be fine-tuned in Lines, by activating/deactivating extension lines or reducing their length.
In a nutshell, the process boils down to opening the manager's (D)Create a new style, adjust Lines, Symbols and Arrows, Text and Units, and validate in the drawing. With careful choices of size and precision and consistent nomenclature, your dimensions become legible and professional. This care, repeated in templates and reused between projects, saves time and reduces errors throughout production.

 English
  Portuguese
  Spanish